Try out Ximera!
To author using Ximera, you must have a GitHub account. GitHub is a
web platform where developers can store, share, and manage their code.
GitHub uses git, popular software for version control, to help teams work
together simultaneously without overwriting each other’s changes. GitHub has
- issue tracking,
- pull requests for proposing changes,
- the ability to merge code,
and other project management tools. It’s like a shared folder for coding, designed to help teams work together and track progress. Go to https://github.com and either sign-up or log-in. Note, you must know your username and password, so store them in a safe place; like in a safe, or under your bed.
1 Deploying content
After you have a GitHub account, you have some choices for how you deploy Ximera content.
Experts experienced with GitHub, VS Code, and Docker, can set up Ximera on their own machine using local installations of this software. If you choose to follow this path, check out the repositories:
Beginners (and experts!) can use Overleaf Premium to effortlessly deploy Ximera documents. Overleaf is a popular online LaTeX editor. The premium features provide integration with GitHub. If you choose to follow this path, check out the repositories:
- https://github.com/ximeraProject/ximeraFirstOverleafSteps
- https://github.com/ximeraProject/ximeraNewOverleafProject
First time Ximera authors will find it easiest to use Overleaf Premium and the repository:
In the remainder of this section, we will walk you through the steps to create your own copy of this repository, and start editing and deploying Ximera content.
You will see something like this:
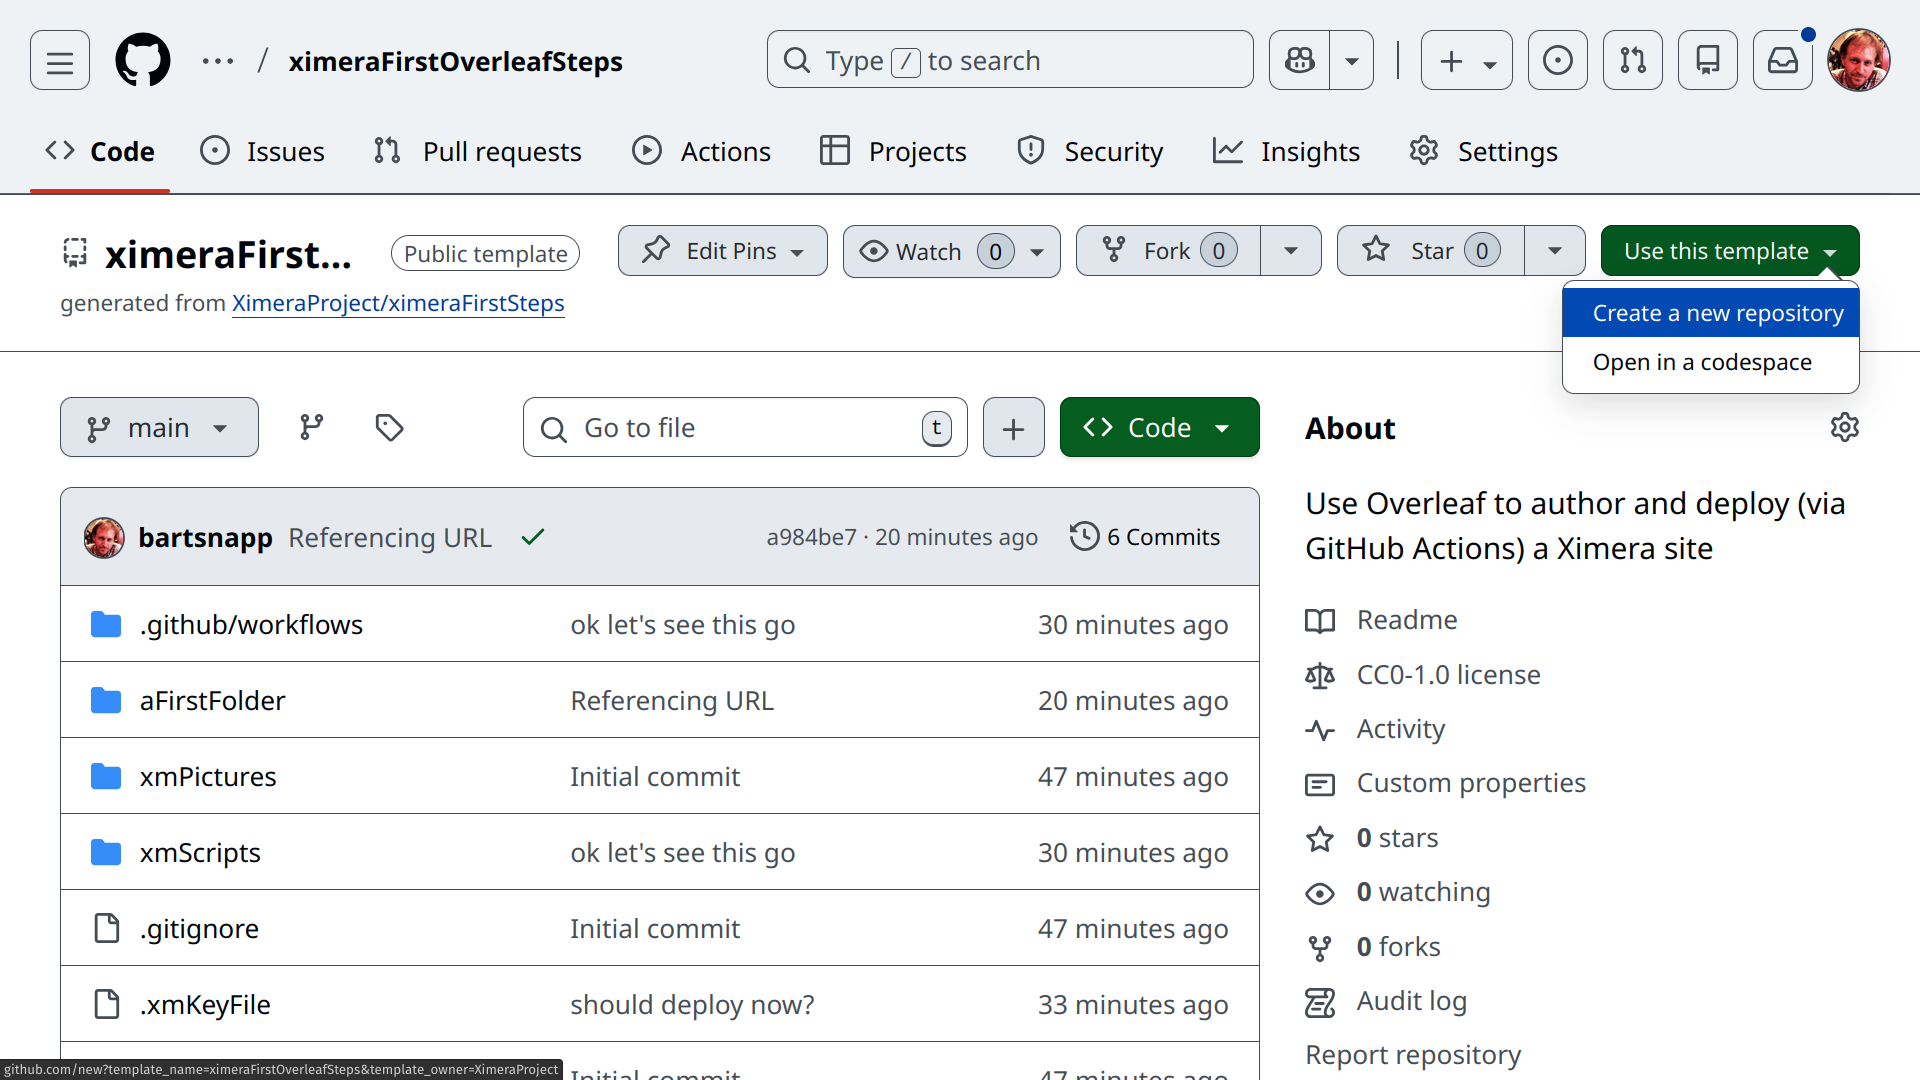
Click on the green “Use this template” button and select “Create a new repository.”
Give it a fun repository name (use only letters, numbers, spaces and if necessary “-”), and push the button “Create repository.”
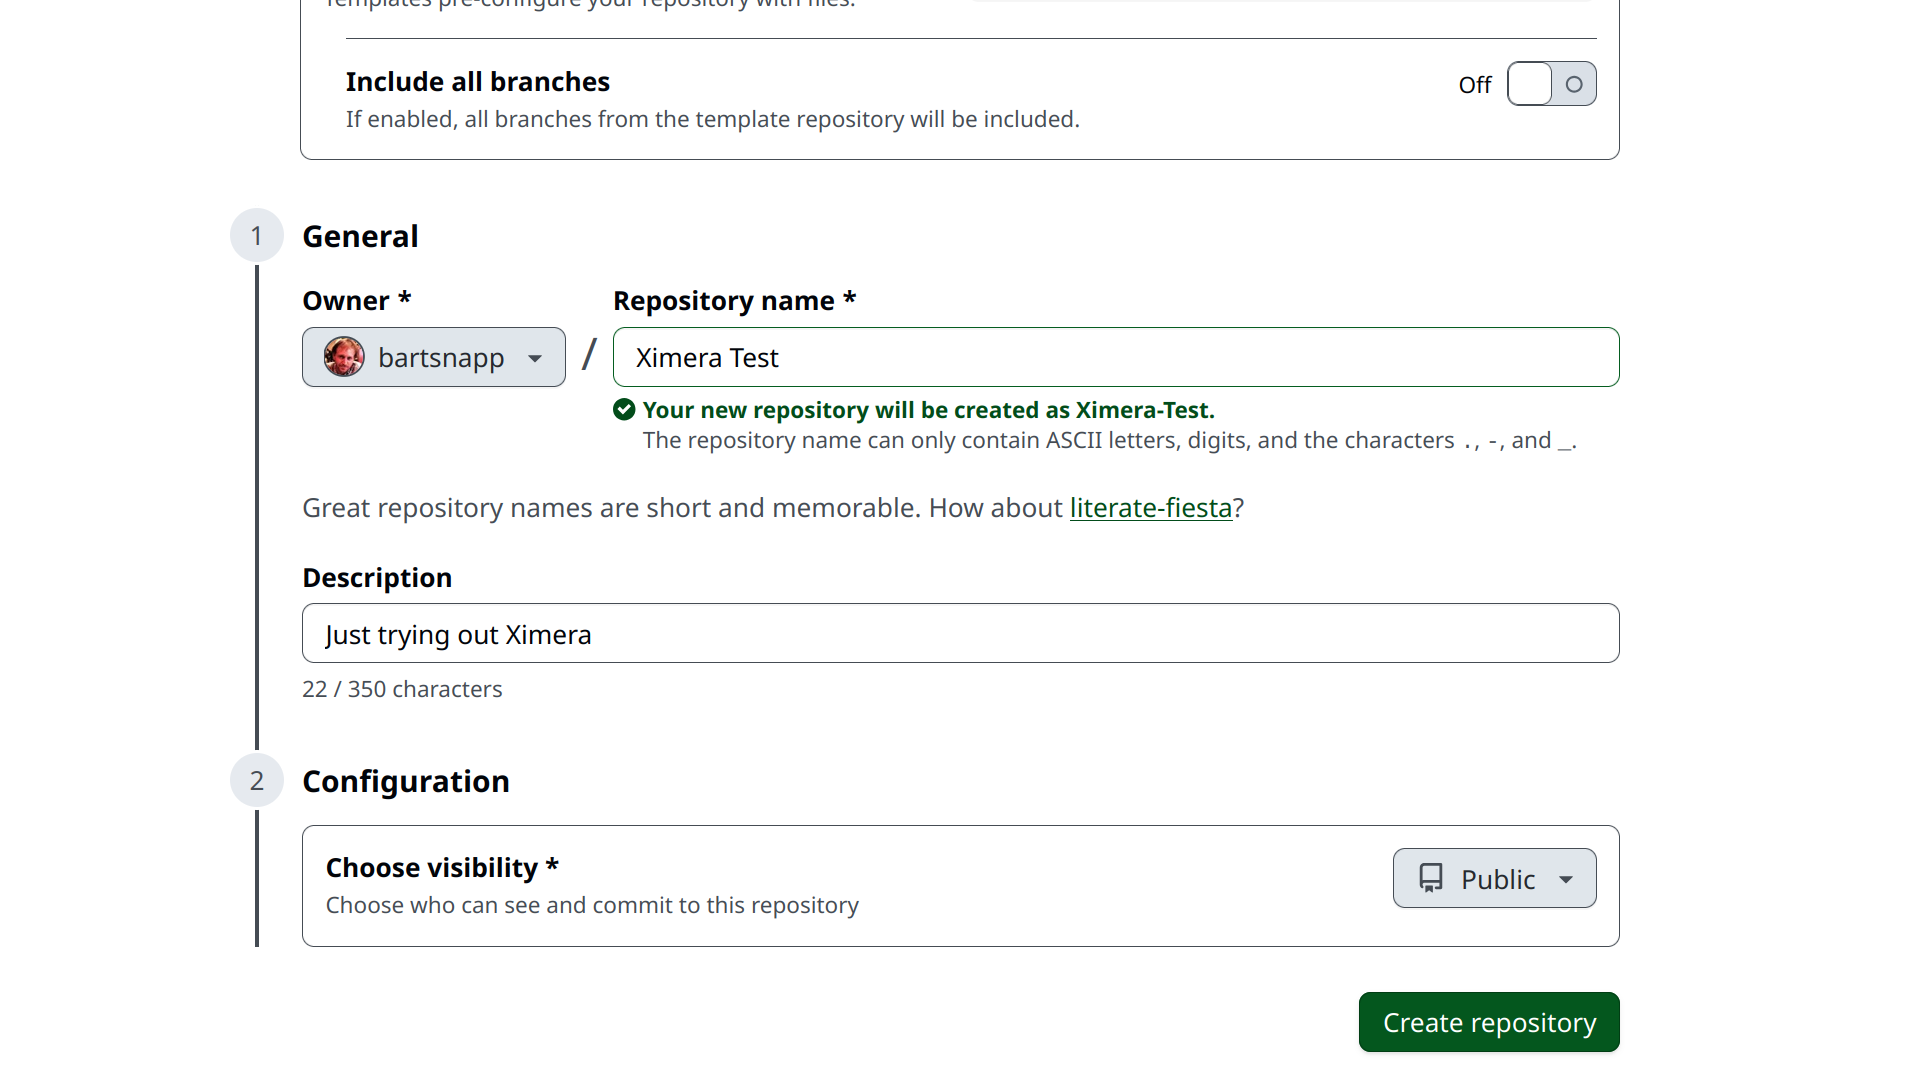
At this point you have your own
personal copy of our repository ximeraFirstOverleafSteps. In fact, after
you create it, GitHub will take you to it. This copy can always be found
at:
https://github.com/YOUR-GIT-USER-NAME/YOUR-REPO-NAME
For the example used in this manual, the URL would be:
https://github.com/bartsnapp/Ximera-Test
Note, GitHub automatically replaced the spaces with hyphens in the the name. At this point your own personal copy of the repository is deployed on the Ximera server:
https://xerxes.ximera.org/USERNAME-REPO-NAME
With the content here deployed at:
Now it is time to open Overleaf.
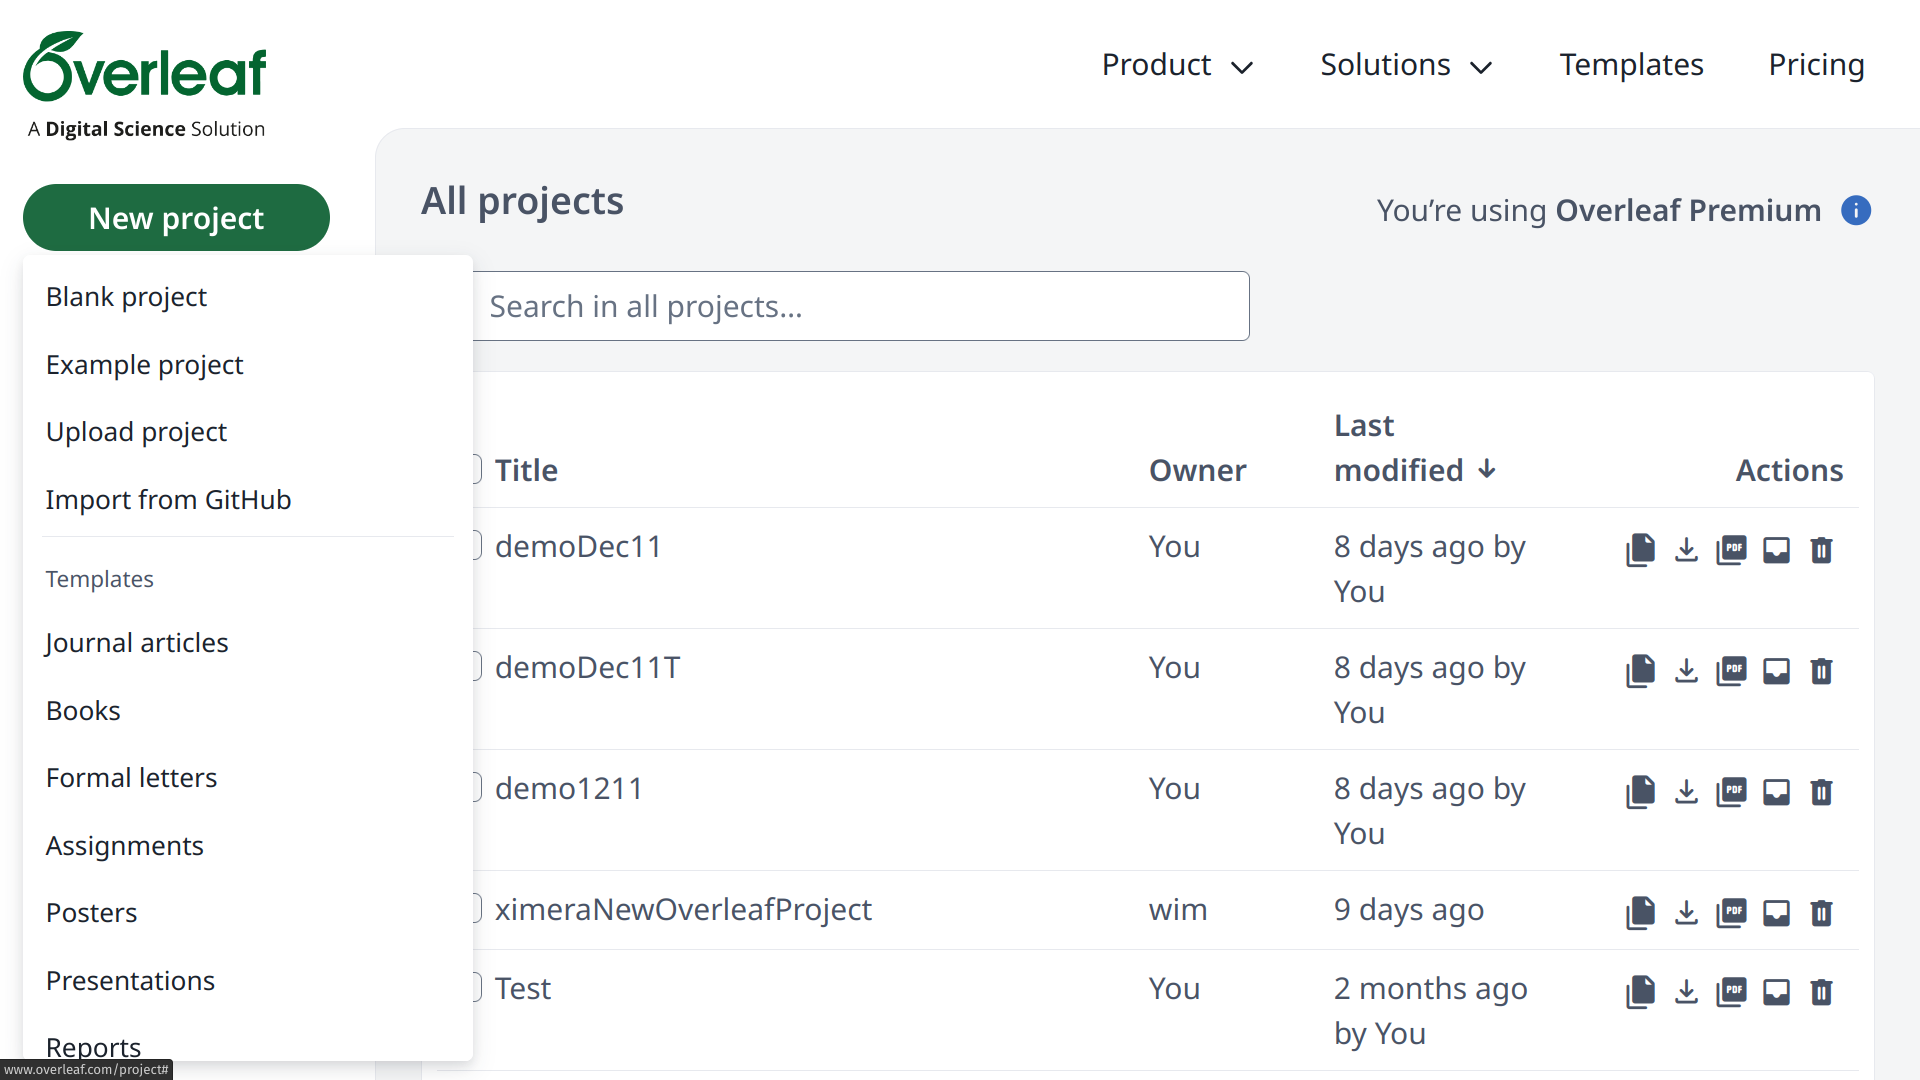
In Overleaf, select “New project” and then “Import from GitHub.” You will be asked to connect with GitHub. When you do, you will see a list of GitHub repositories. Select your Ximera GitHub Repository.
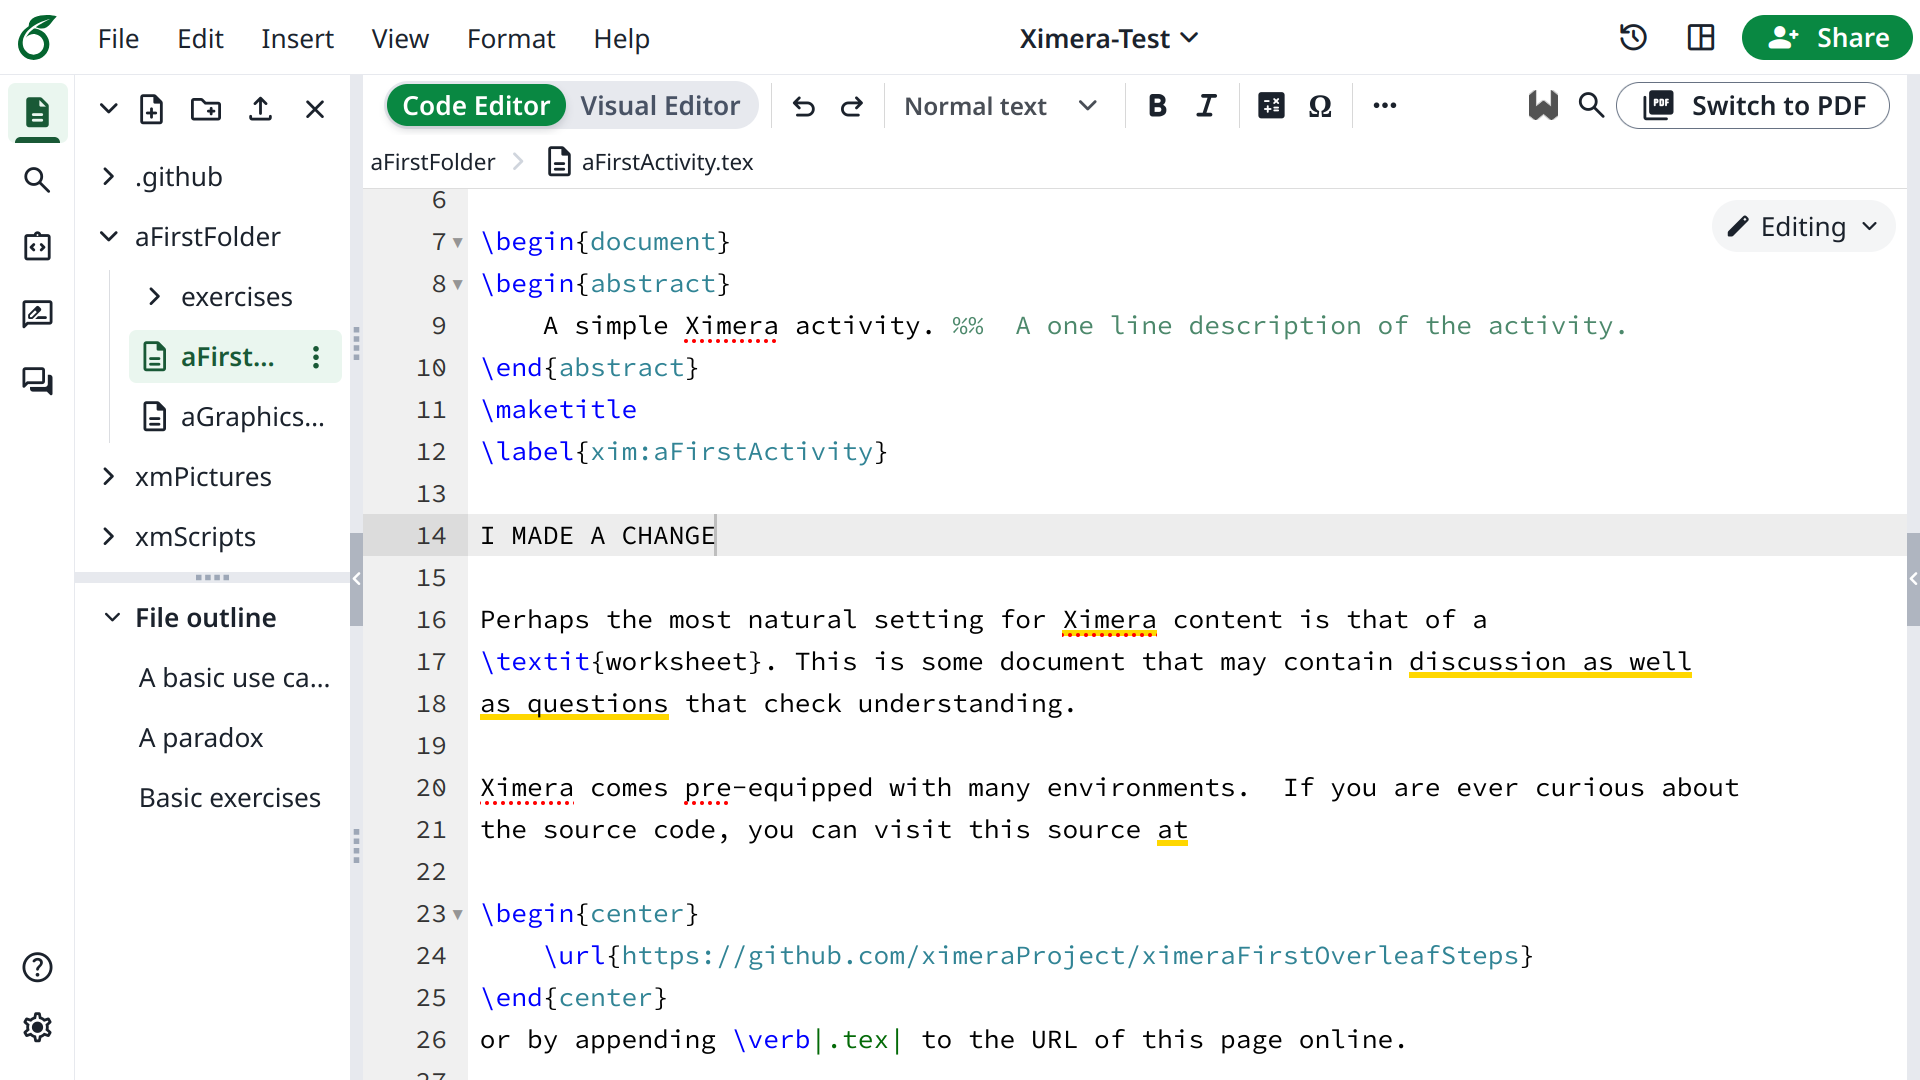
Once the files load in Overleaf, you can go to:
And make some changes. For example, I made a change at line 14.

After you have made your changes, go to the “Integrations” tab on the left side of the Overleaf window. Then select “GitHub Sync.” When you Push to GitHub, your changes will be sent to your GitHub repository, and automatically deployed to the Ximera server. You can check this by going to your Ximera URL:
In our example, the URL is:
You should see your changes live on the Ximera server!
Demo versions of this repository are published as: