git, and help you make changes on your own.
Once you’ve deployed our content in a GitHub codespace, you’ll surely want to change it and make it your own.
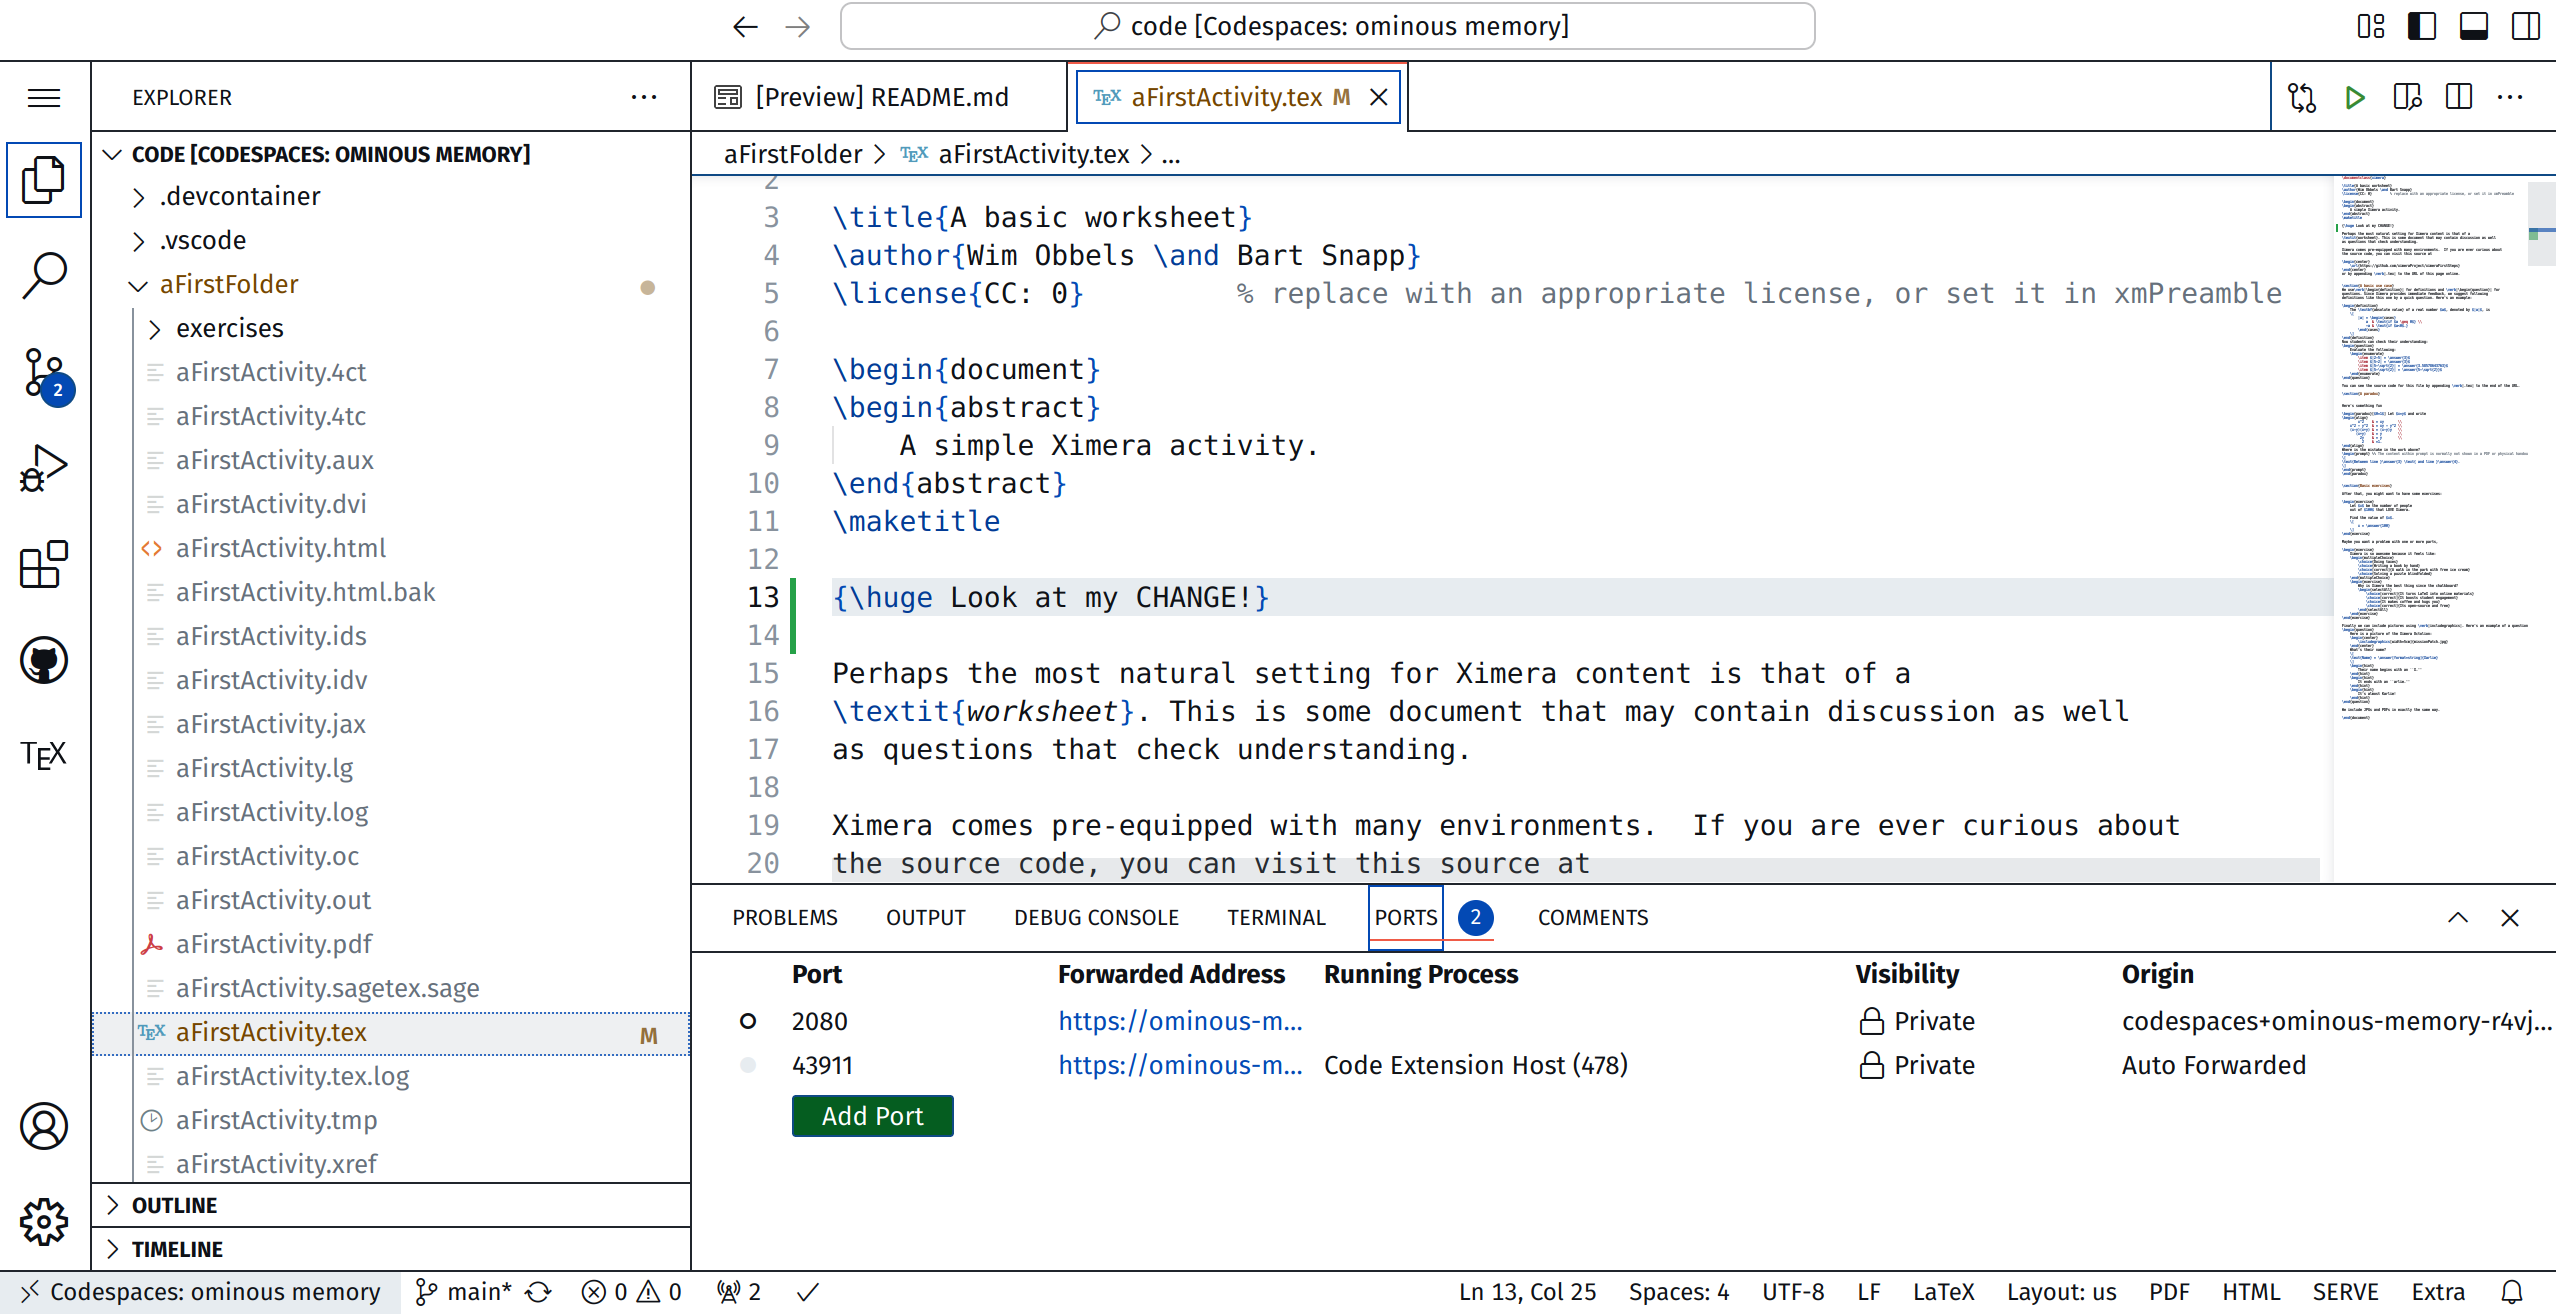
Within codespace, you are running VS Code, a full-fledged
text editor. You can make changes directly there. Our files are on the left, and are
revealed by the “pages” icon. Here, I’ve opened the folder aFirstFolder, and then
the document aFirstActivity.tex. I made a change in the middle of the
screen.
At this point, you may push “SERVE” and see the results of your change; however, these changes were made only in your temporary codespace, a virtual computer, lost in the cloud. To make these changes to your actual GitHub repository, you need to “Sync” them back.

Remember, git is version control software. This means that it is like a magical
notebook that remembers every change you make to your project. It helps
you go back in time if something breaks and lets you share your work with
others. For this reason, it makes you do a little “dance” to ensure good code
hygiene.
Step 1: Staging Files (The “+” Button) You start by clicking on the icon that looks like a poorly drawn “Y” with lines and circles on the left. Then you click on a \(+\) for every file you want to send to your repository. When you click the little “+” next to a file, you’re saying,
“Hey git, this file is ready to be saved!”
This adds the file to a special list called the staging area. Only files in this list will be saved in the next step.

Step 2: Committing Changes (Saving Your Work) After staging your files, you
- (a)
- type a message directly above the green “Commit” button.
- (b)
- Click “Commit.”
This tells git:
“Save these changes forever, and here’s a note about what I did.”
git takes a snapshot of the staged files and saves them with your message. If you
would ever need to undo your work from this point, this message will help guide your
future-self.
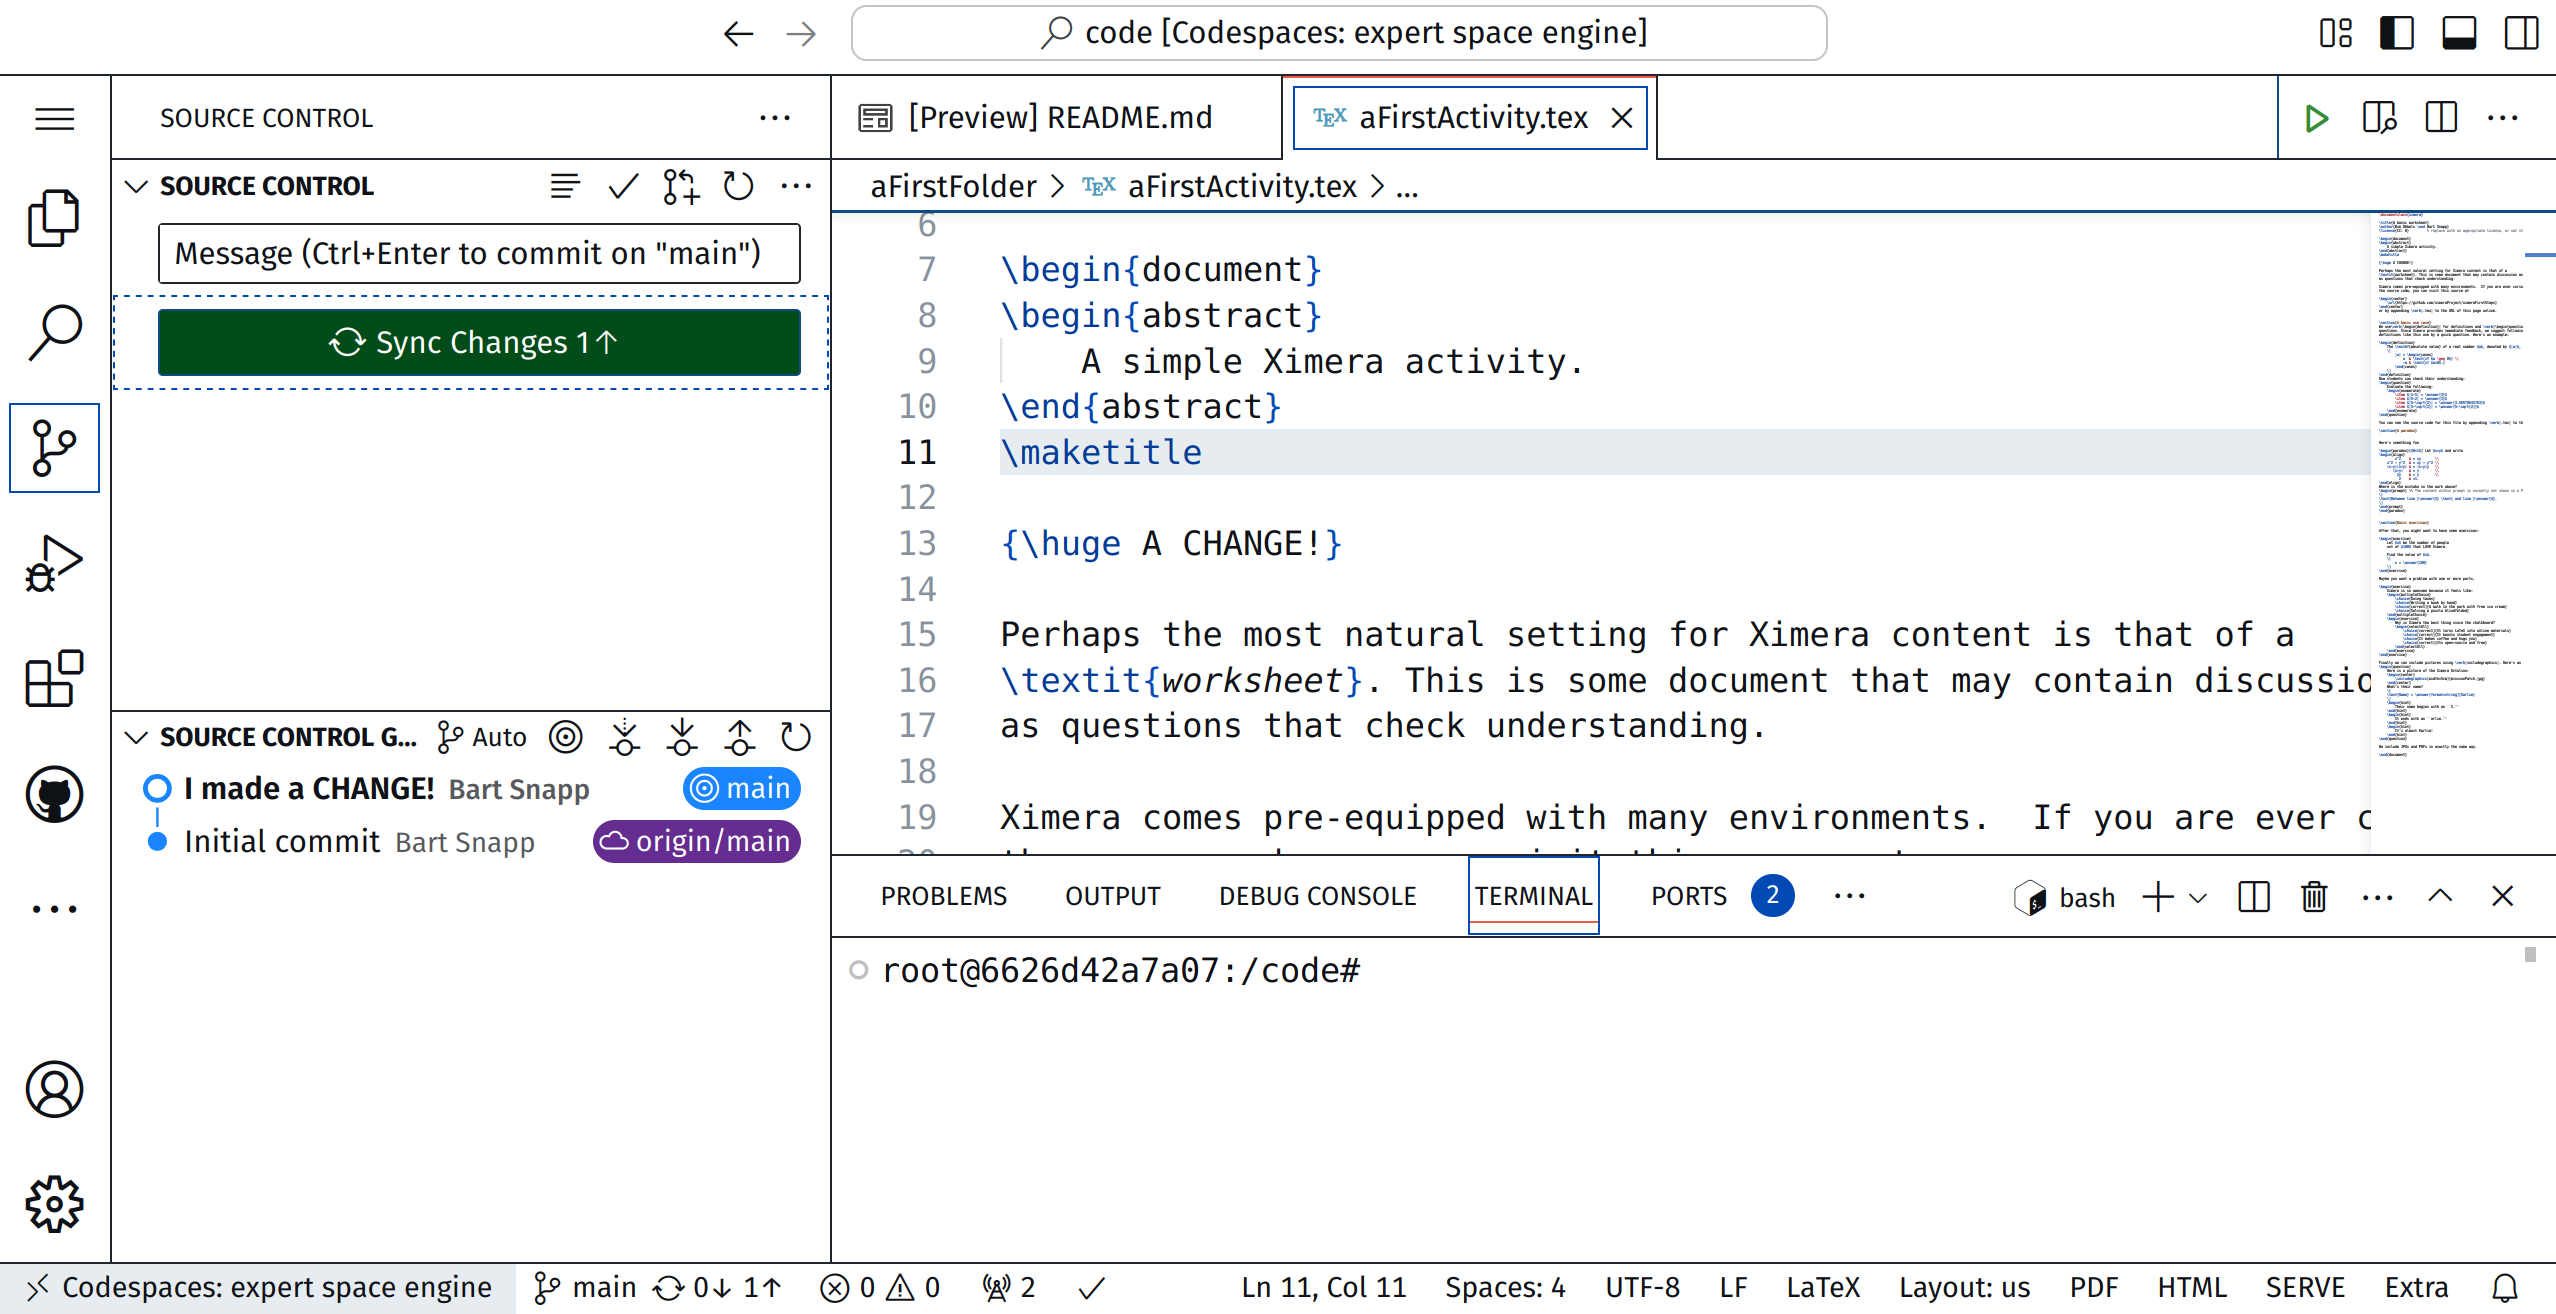
Step 3: Syncing with GitHub (Sending Your Work Online)
When you click “Sync Changes”, you’re telling git:
“Send my saved changes to the repository on GitHub.”
git takes your saved changes and sends them to your remote repository (the one
on GitHub). At the same time, it checks if there are any new changes from
your teammates and brings them back to you. At this point, VS Code in
your codespace will ask you if you periodically want to sync. You can click
“Yes.”

To check that everything worked correctly, go to
Above we see my repository, and we see that my change was indeed made.
The git workflow
can seem overwhelming. Use the VSCode buttons, or type explicit commands in the
Terminal.
- Stage
-
Select with the “+” button what you want to commit (save). Or type
git add FILE-NAME-1 FILE-NAME-2 # You can list multiple files or git add -u # Add all modified files - Commit
-
Write a message and click “Commit” to save your changes.
git commit -m ’A GOOD MESSAGE’ - Sync changes
-
Send your changes to GitHub and get updates from your team.
git pull && git push
Check on GitHub by visiting:
https://github.com/YOUR-GIT-USER-NAME/YOUR-REPO-NAME