To use Ximera, you must have a GitHub account. GitHub is a web platform where
developers can store, share, and manage their code. It uses git, popular software
for version control, to help teams work together simultaneously without
overwriting each other’s changes. GitHub has issue tracking, pull requests for
proposing changes, and other project management tools. It’s like a shared
folder for coding, designed to help teams work smarter and track progress.
Go to https://github.com and either sign-up or log-in. Note, you must
know your username and password, so store them in a safe place; like in a
safe, or under your bed. After you have a GitHub account, log-in and go
to:
You will see something like this:
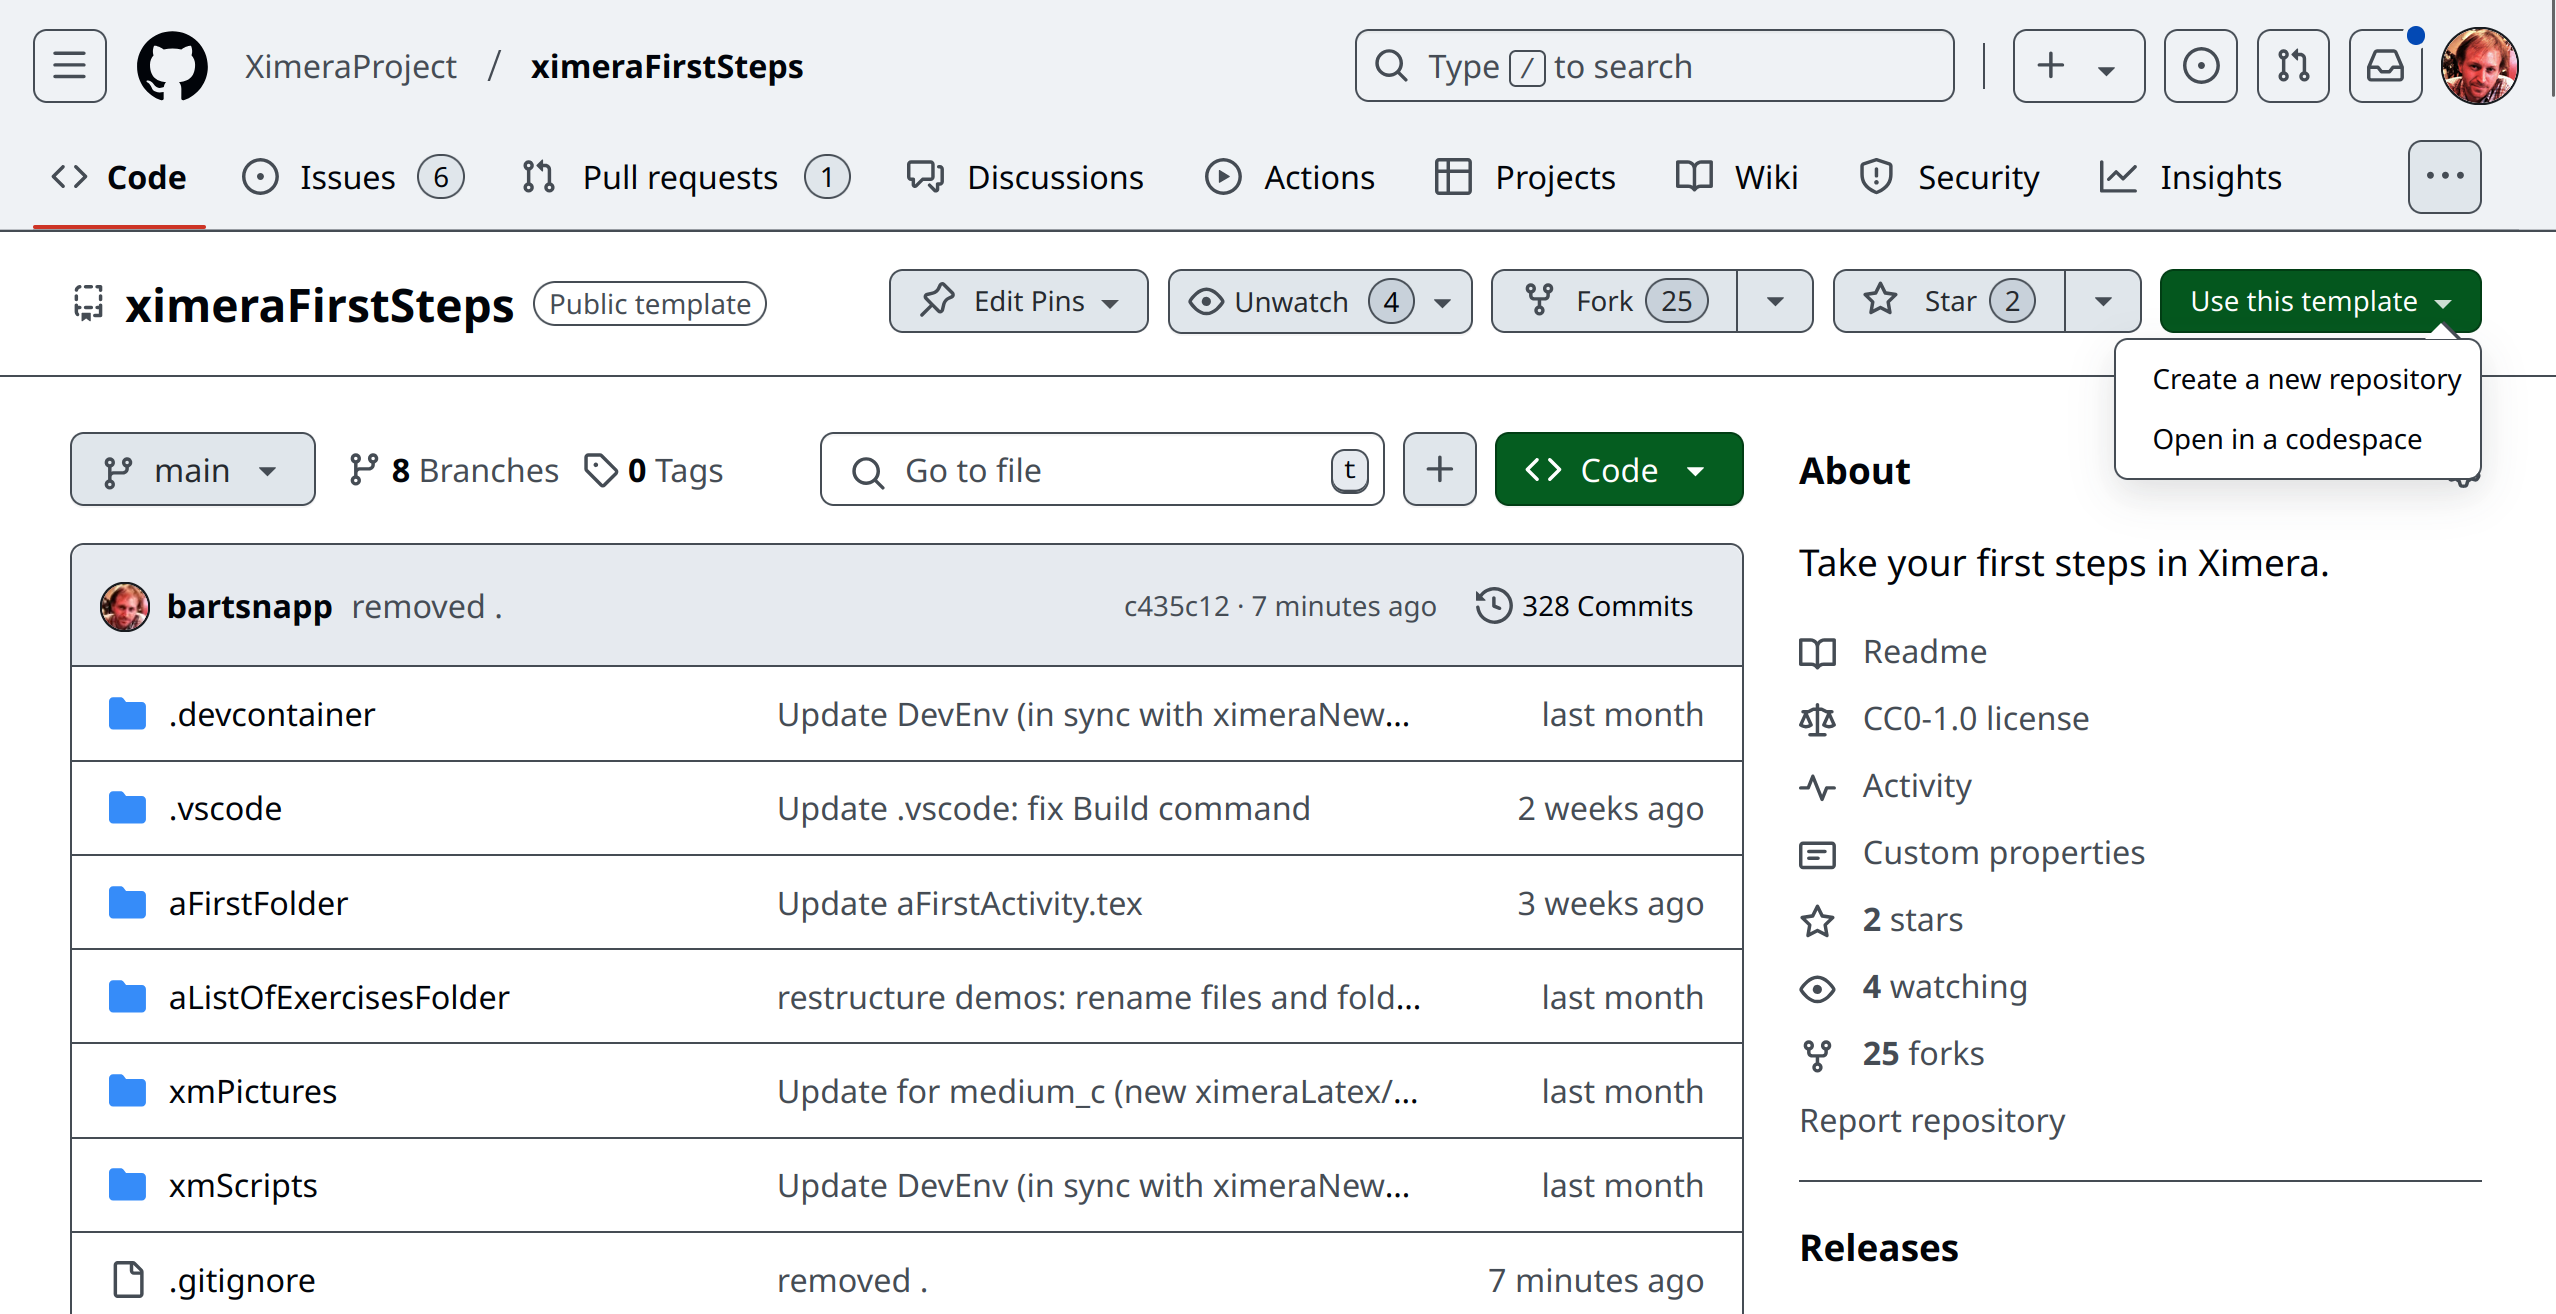

Click on the green “Use this template” button and select “Create a new
repository.” Give it a fun repository name, and push the button “Create repository.”
At this point you have your own personal copy of our repository ximeraFirstSteps.
In fact, after you create it, GitHub will take you to it. This copy can always be found
at
https://github.com/YOUR-GIT-USER-NAME/YOUR-REPO-NAME
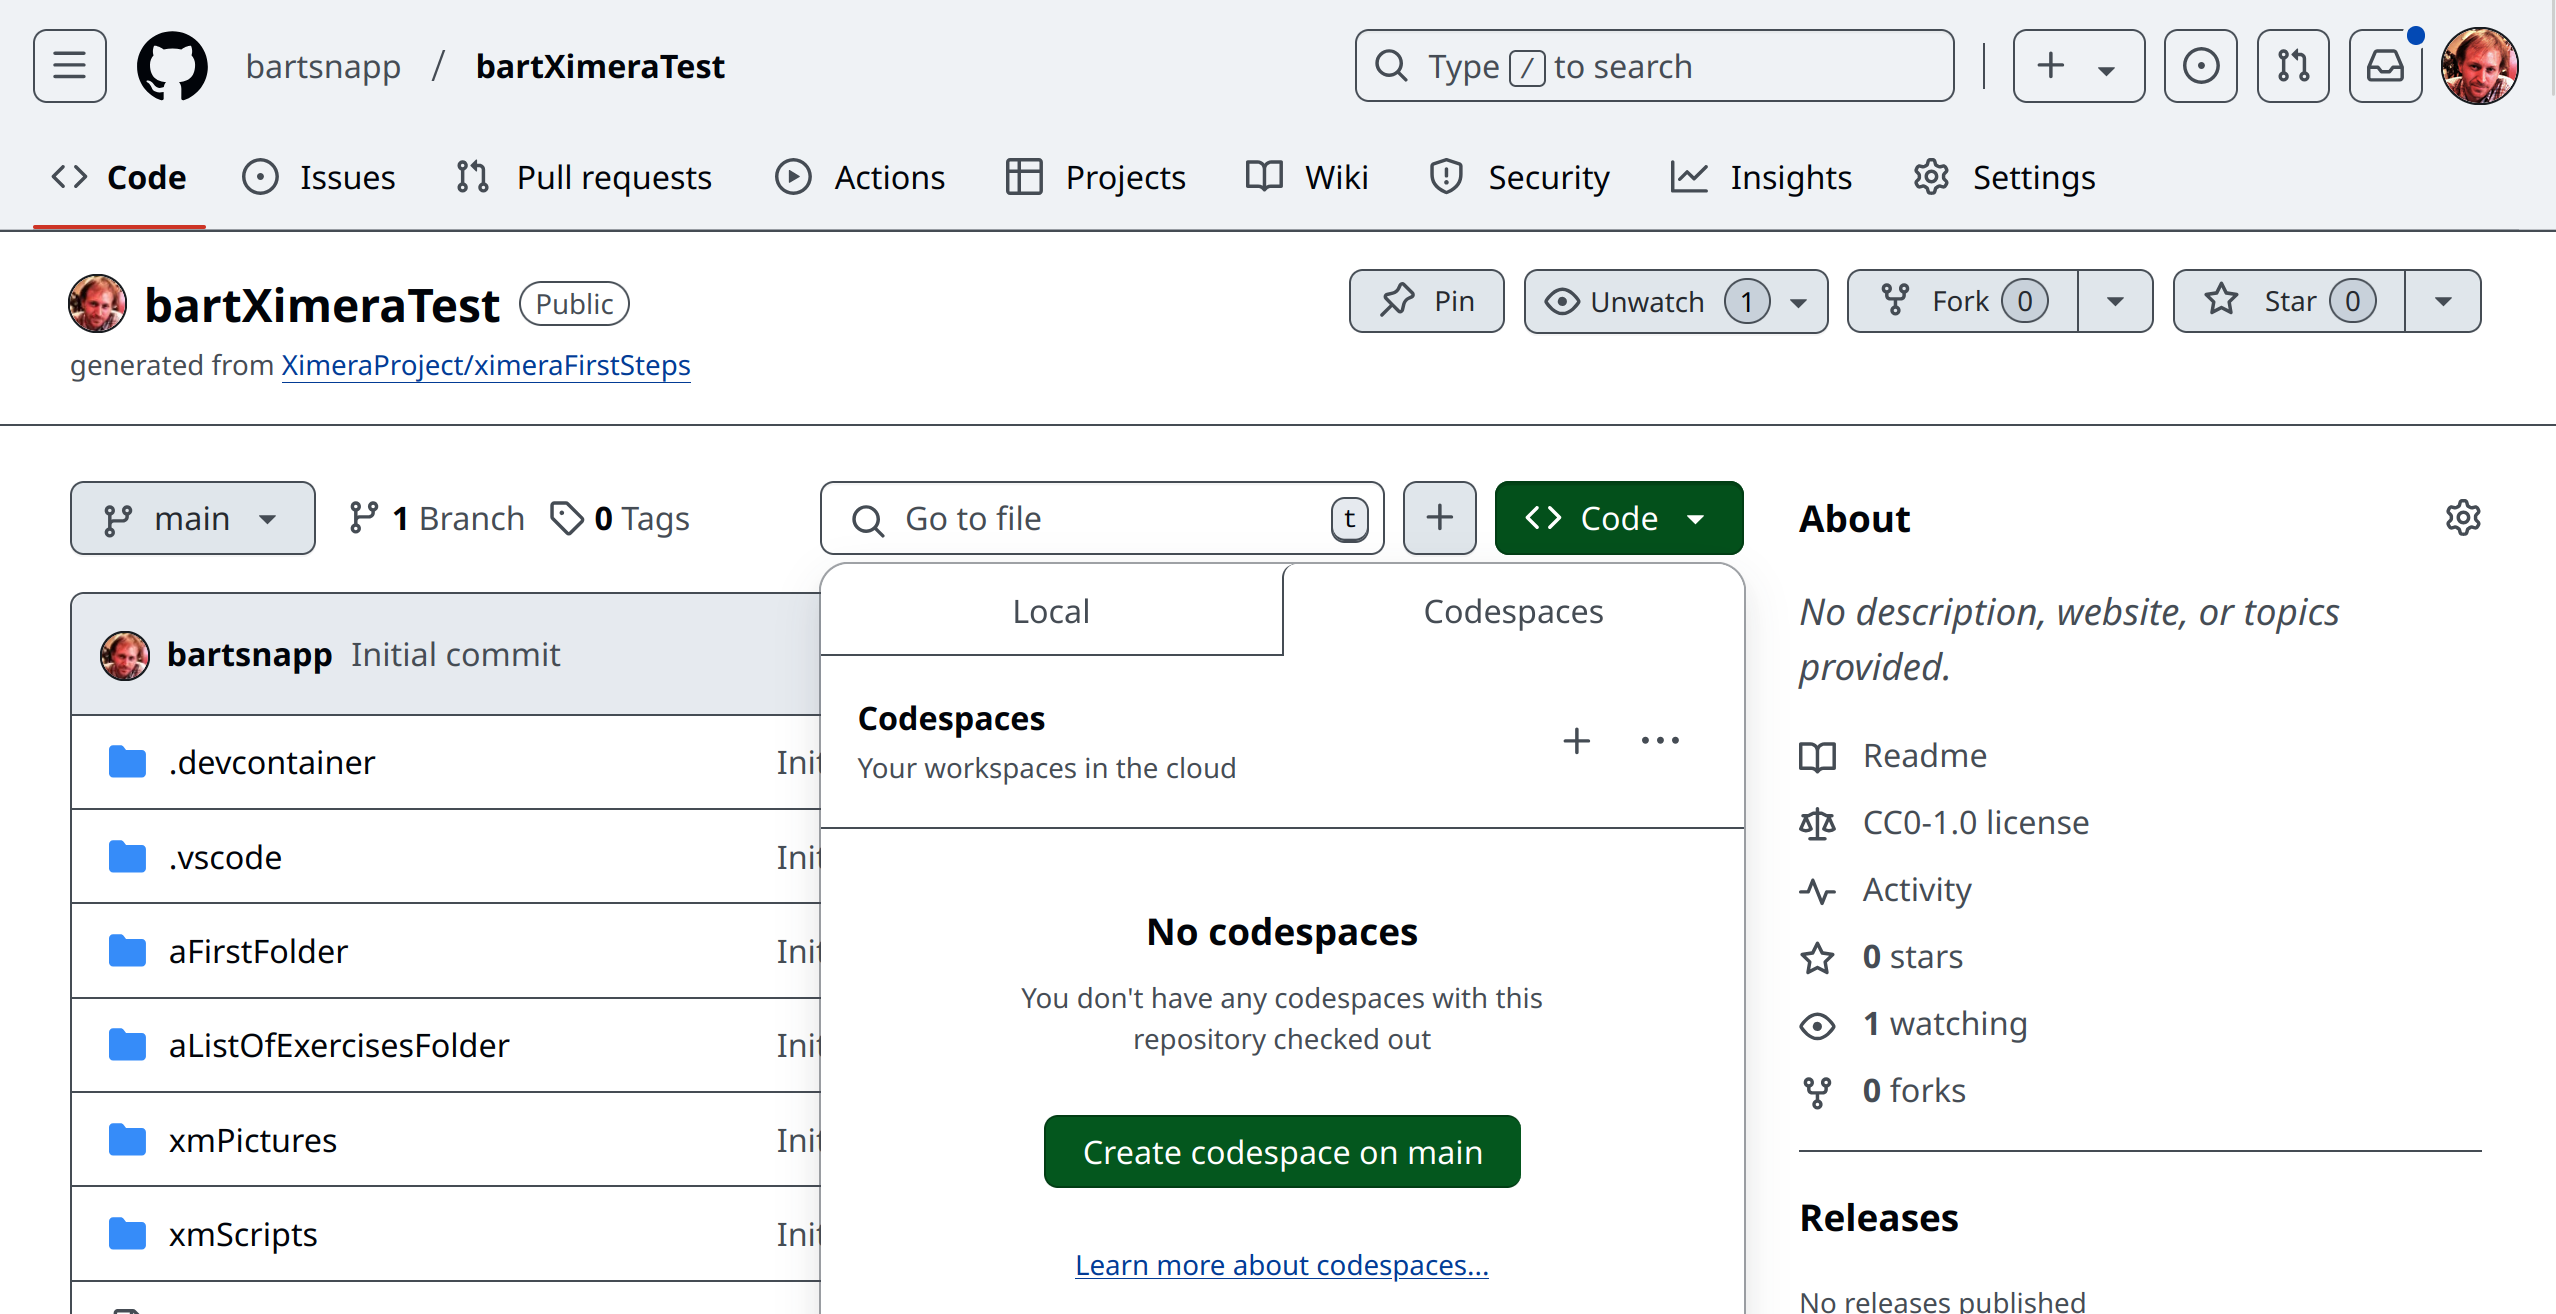
Once there, click the green “Code” button, select the “Codespaces” tab, and click “Create codespace on main.” A GitHub codespace is a remote computer set up specifically for coding. We have our codespace preconfigured with all the tools, libraries, and software you need for a Ximera project. With a codespace, you can instantly start working without worrying about setting up software on your local machine. Moreover, others can go to your GitHub page, start their own codespace, and try out your code. It will take around 5 minutes for your codespace to be created and you must wait until it is complete.
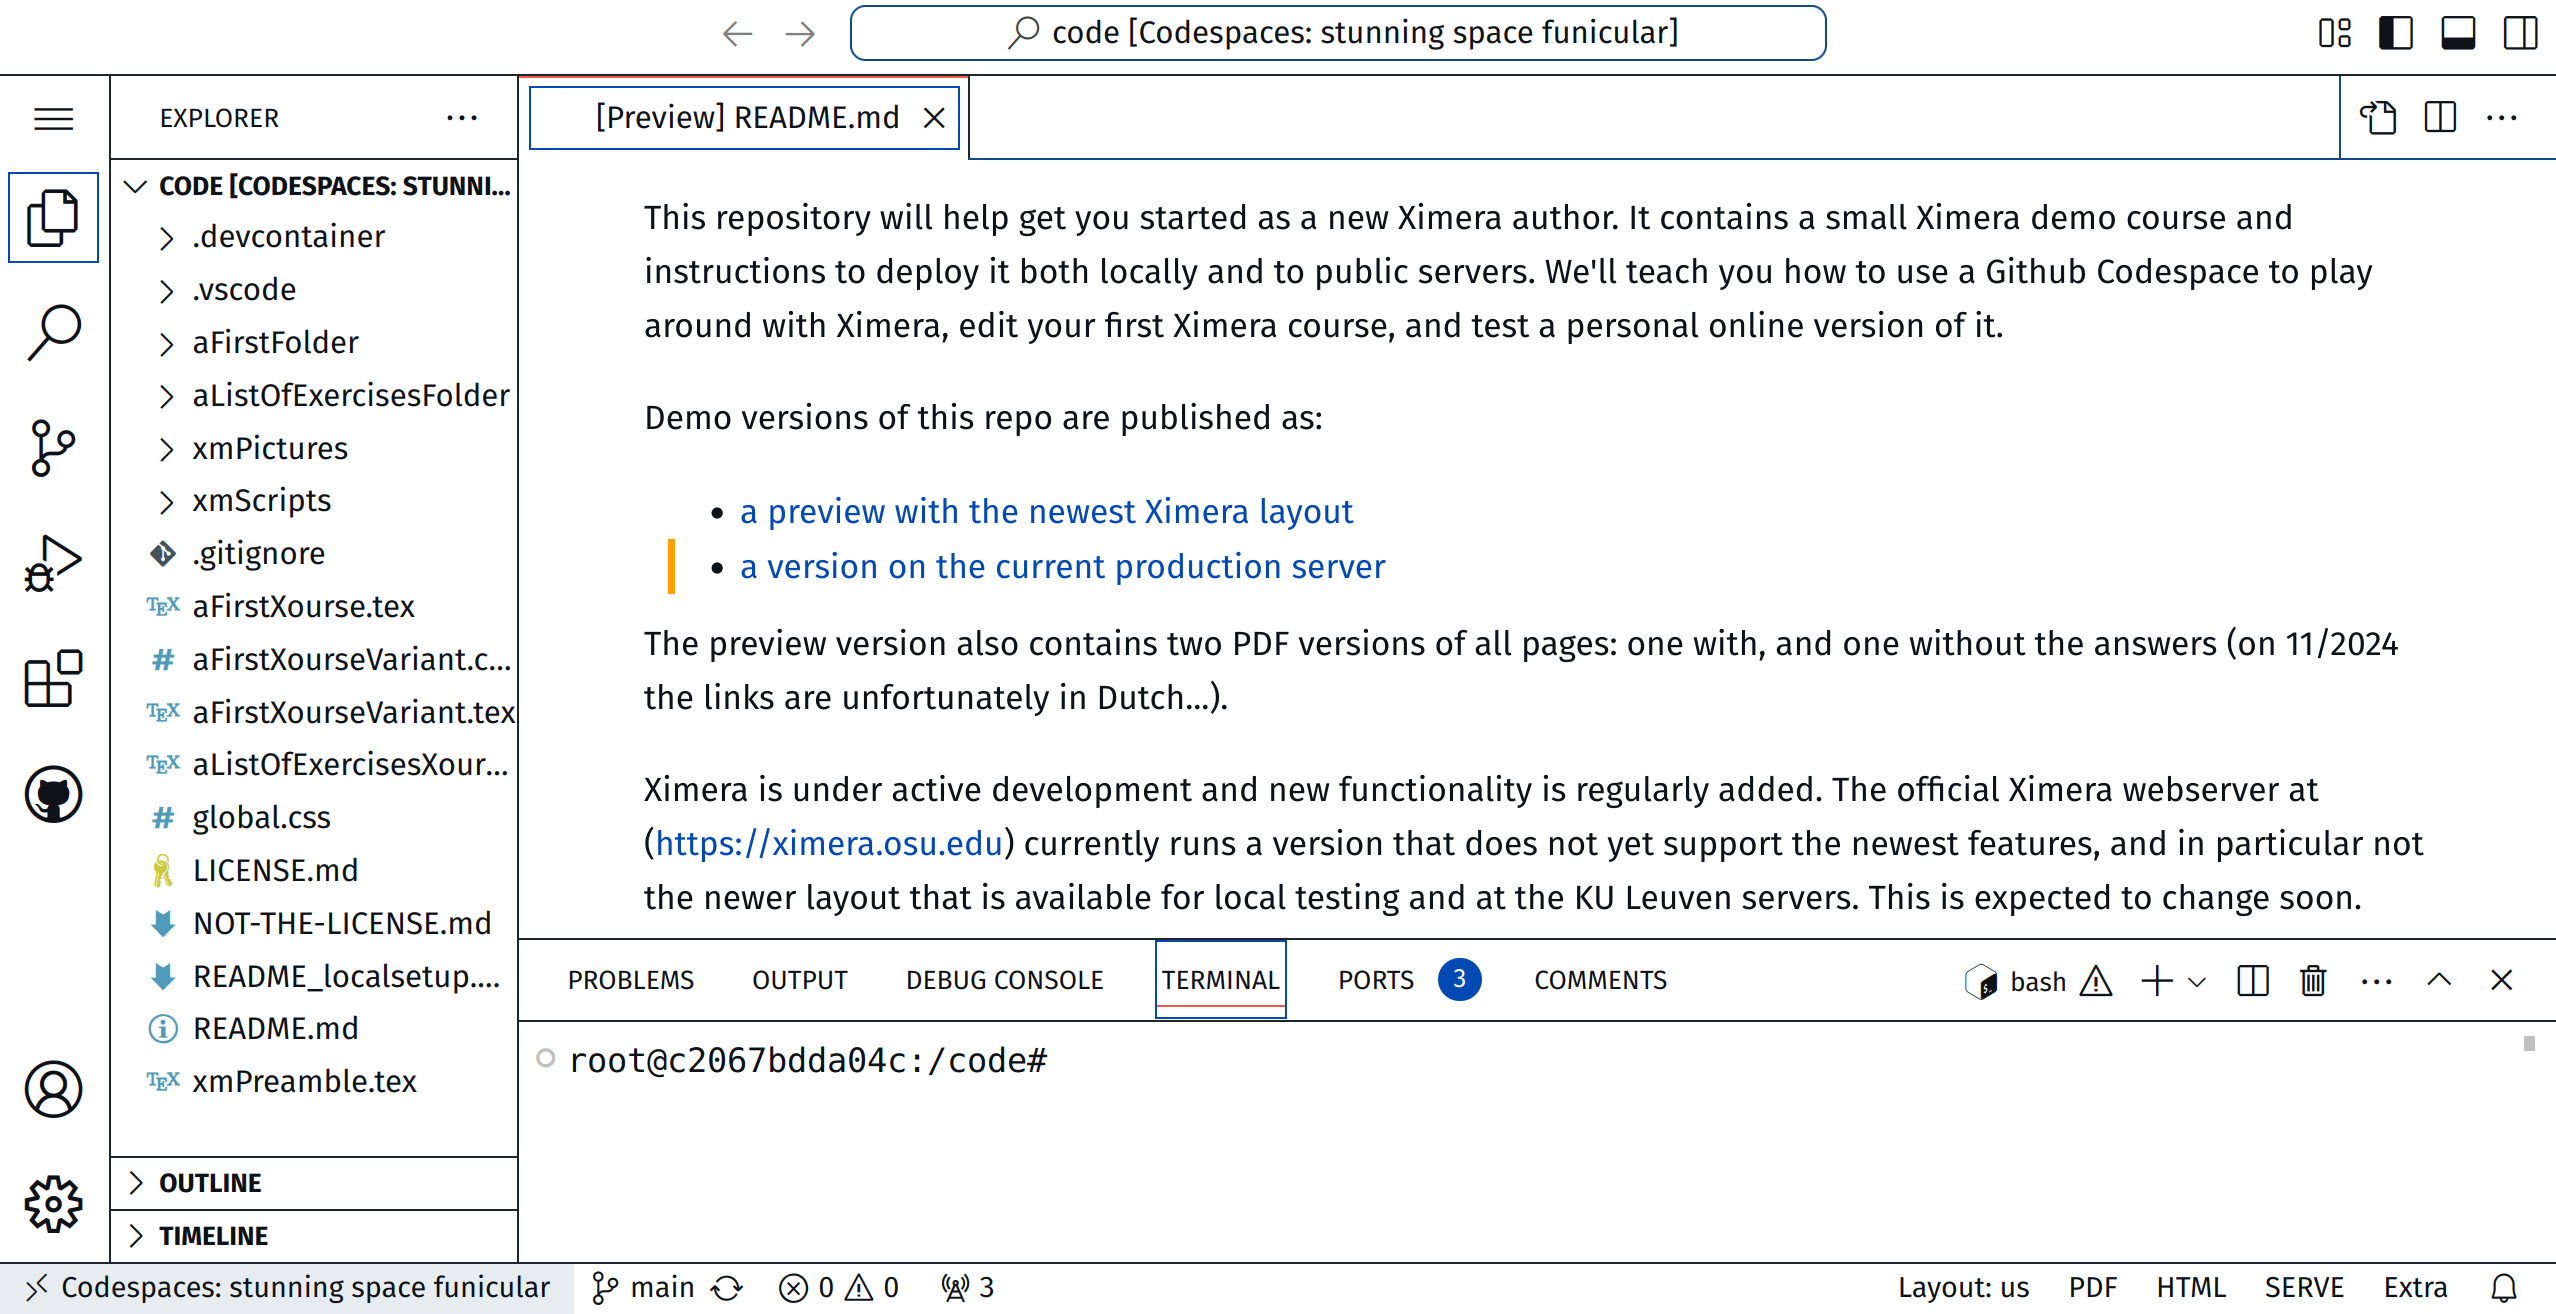
Once the codespace is created, you will see something like what we have above.
This is Visual Studio Code (VS Code) running within your browser. This is a
powerful text-editor with many extensions. One could use it write Ximera content.
On the far left, you see a vertical list of icons. Currently, “EXPLORER” is selected,
it looks like “pages of paper.” Moving right, we see the files in our GitHub Repo. At
the bottom right-hand corner of the screen you will see a buttons that say
“PDF” and “SERVE.” These buttons were added by the files in .vscode/.
Press the “PDF” button to compile Ximera content to a PDF. Press the
“SERVE” button to compile Ximera content to HTML and JavaScript. This will
take a few minutes. When the compilation is finished, note the line that
says: “PROBLEMS,” “OUTPUT,” “DEBUG CONSOLE,” “TERMINAL,”
“PORTS.”
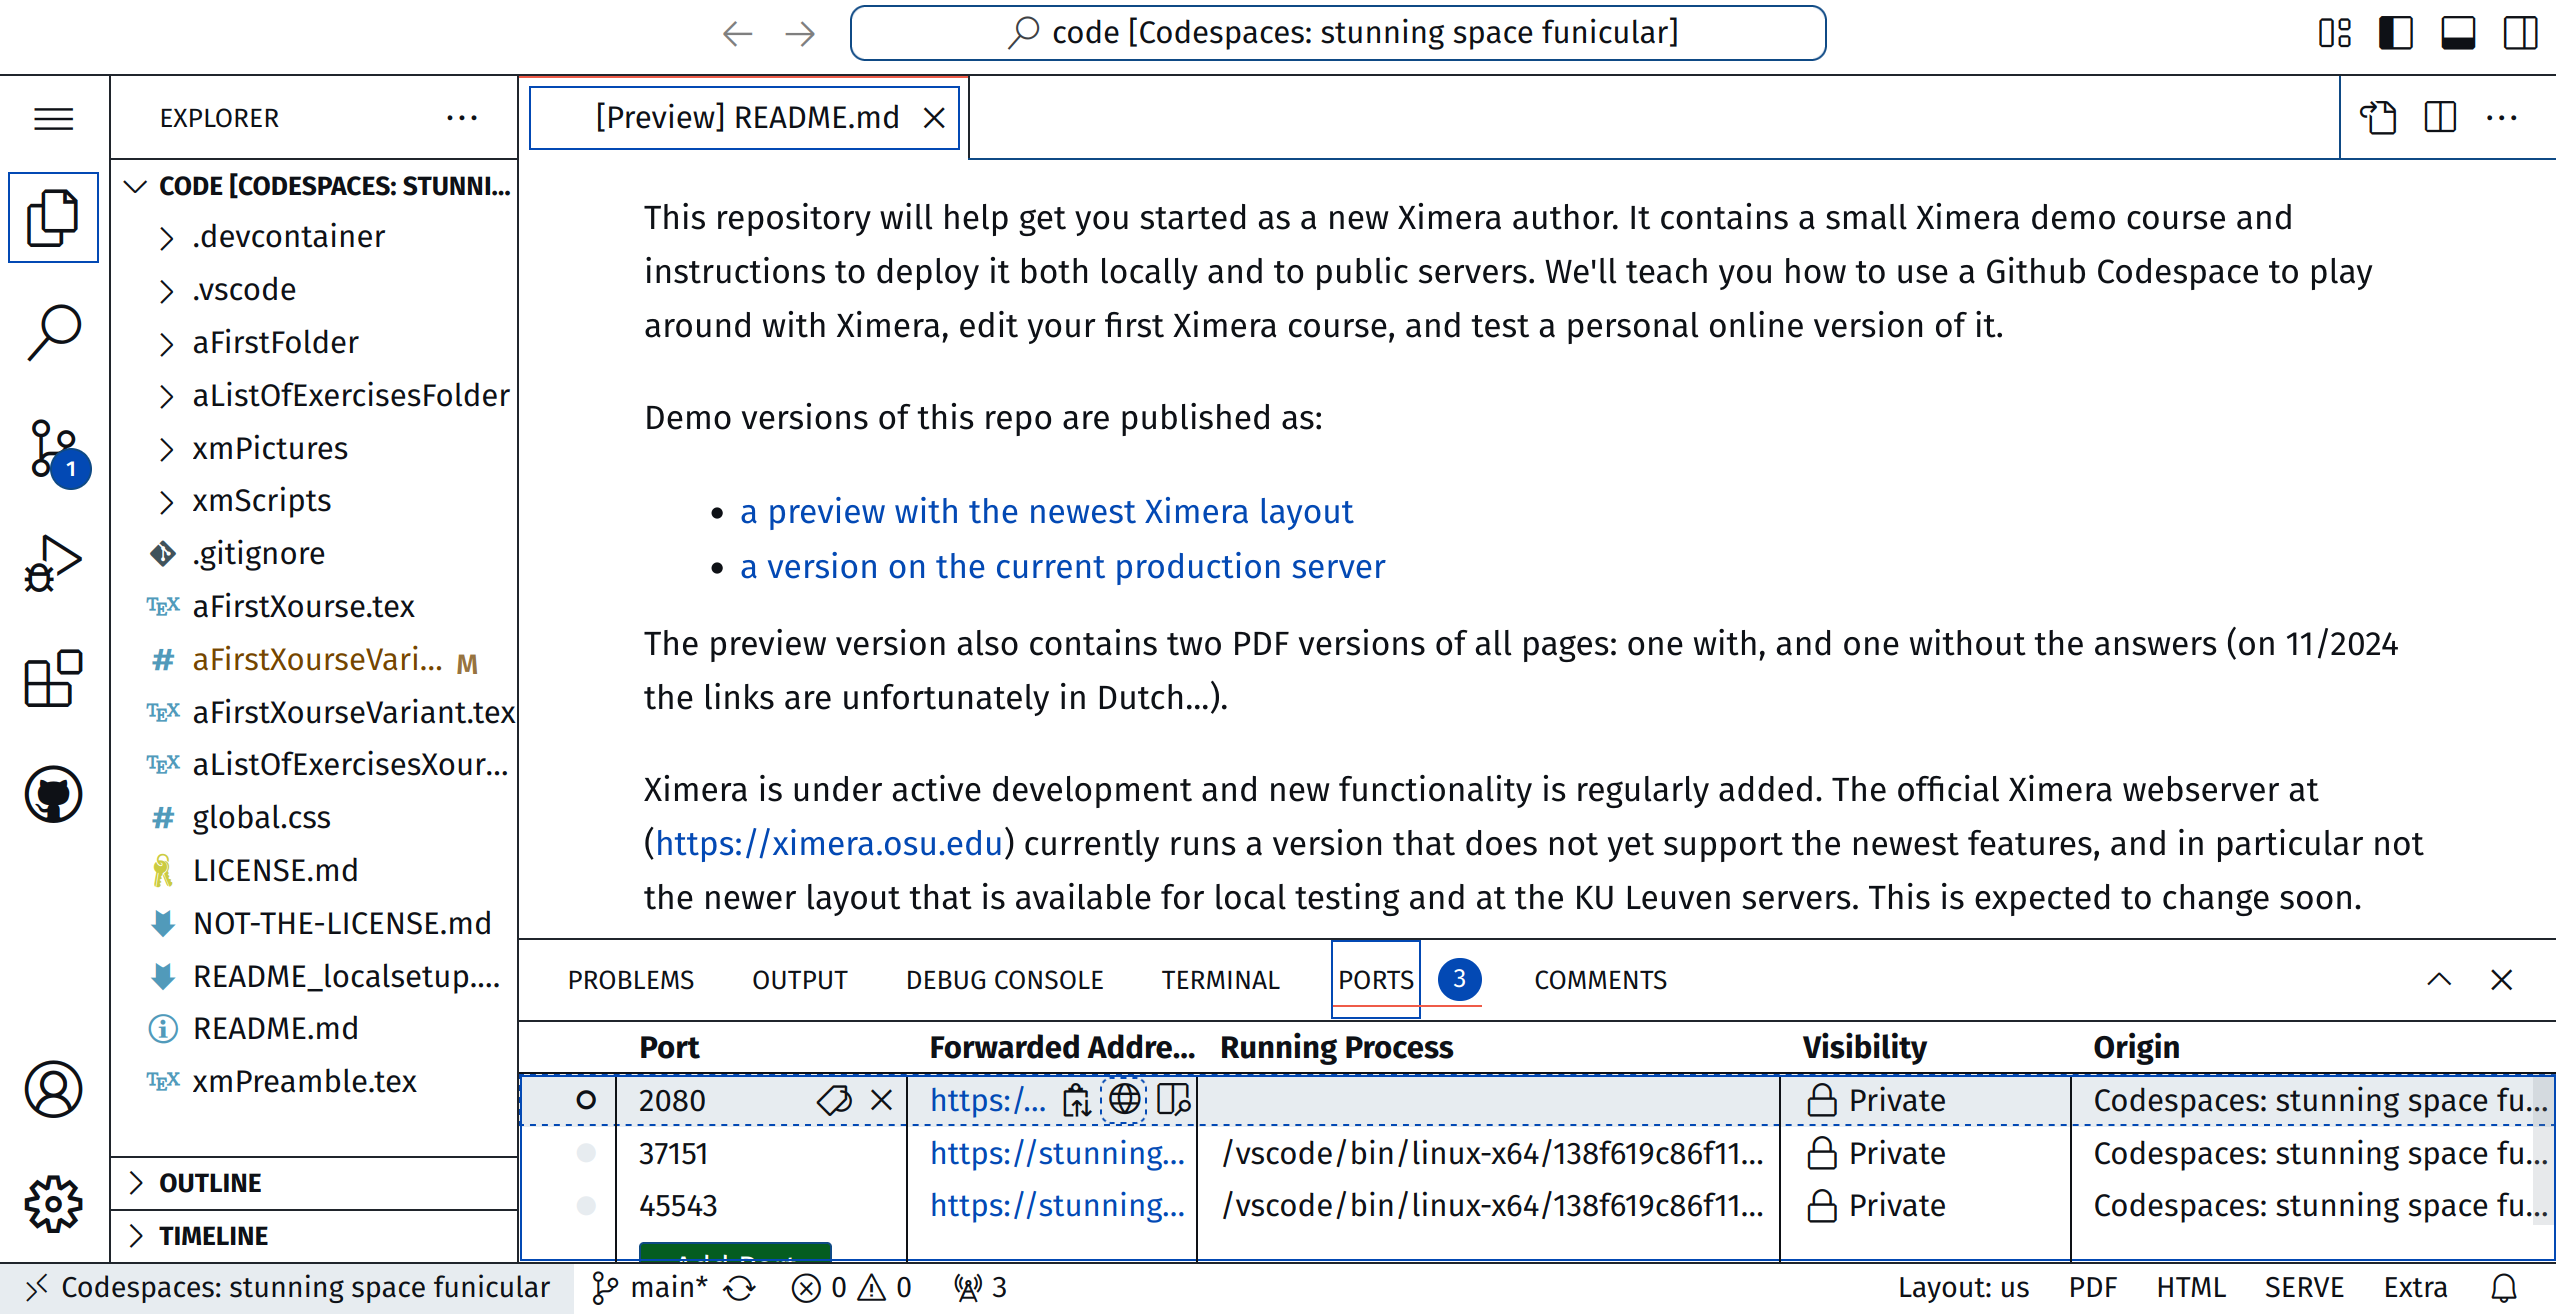
You want to click on “PORTS.” The “PORTS” tab may be hidden within “\(\cdots \).” After you click on “PORTS,” select 2080 and click on the globe, and a webpage will open. Your content will be under the link “Content.” You should be able to see the content in your browser.
You may delete your codespace (you can simply restart it) and others can come to your GitHub repository, start a codespace, and check out and compile your code. This is especially useful if a user runs into difficulty, as a Ximera developer can examine a users exact setup, and help resolve any issues.
Demo versions of this repository are published as:
2024-12-23 16:30:23